Indulge in Homemade Bliss: The Ultimate Copycat Little Debbie Red Velvet Christmas Tree Cakes Recipe
Copycat Little Debbie Red Velvet Christmas Cakes – Get ready to experience pure holiday magic with this incredible copycat recipe! Imagine sinking your teeth into tender, moist red velvet cake, generously filled with a dreamy marshmallow creme, and encased in a crisp, sweet white chocolate shell. These delightful treats aren’t just a nod to a beloved classic; they’re a homemade celebration, perfect for making your festive season extra special. Forget store-bought; this recipe brings the iconic flavor and whimsical tree shape right into your kitchen with real, quality ingredients. It’s more than just a snack; it’s a nostalgic trip down memory lane, reimagined for the discerning home baker.
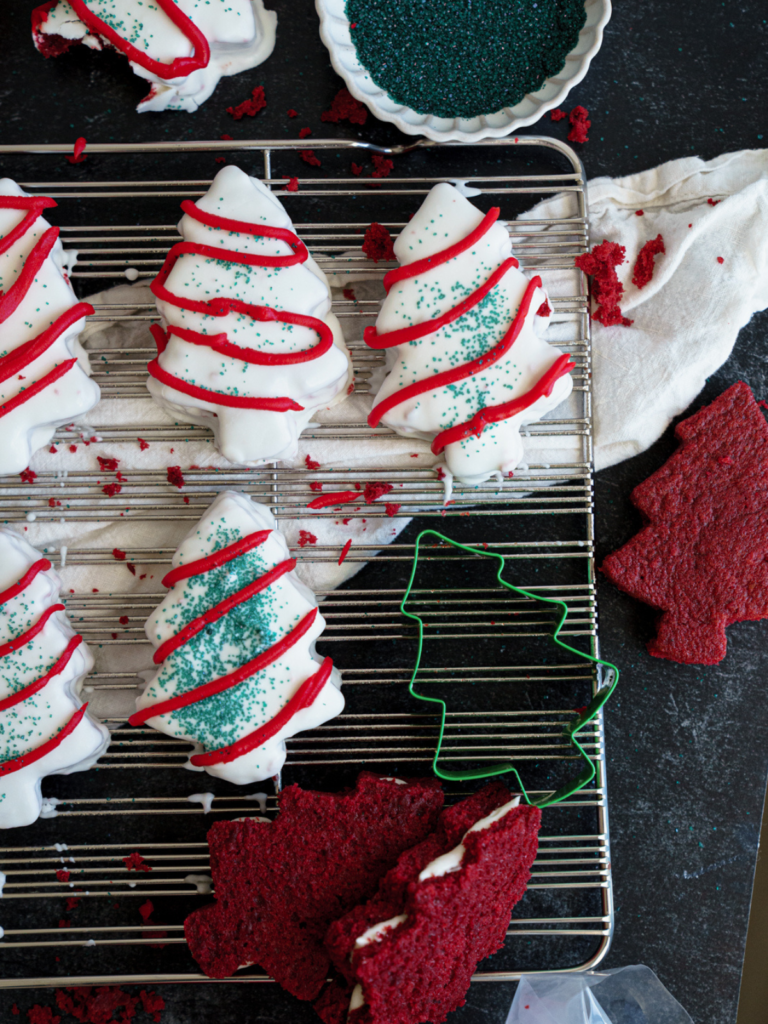
Nothing encapsulates the joyous spirit of Christmas quite like these enchanting Red Velvet Little Debbie Christmas Cakes! They feature a gorgeously moist and flavorful red velvet cake layer, perfectly balanced with a light and airy marshmallow creme filling. Each cake is then generously dipped into a rich, decadent white chocolate coating, creating a delightful contrast of textures and tastes. Shaped into charming Christmas trees, these homemade snack cakes offer a nostalgic twist on a beloved holiday favorite. Whether your goal is to perfectly replicate the iconic snack cake or simply to create an impressive and memorable dessert for your holiday gatherings, this copycat Little Debbie Red Velvet recipe is guaranteed to earn rave reviews. These festive, individually portioned cakes are the ideal treat for family celebrations, office parties, or simply enjoying a cozy evening by the fire. They bring a professional-looking dessert right to your kitchen table with minimal fuss and maximum flavor.
If you’re looking for more festive treats, be sure to check out these other amazing recipes:
- Copycat Little Debbie’s Tree Cake Recipe
- Easy Red Velvet Gooey Butter Cake Recipe
- Best Christmas Peppermint Bark Brownies Recipe
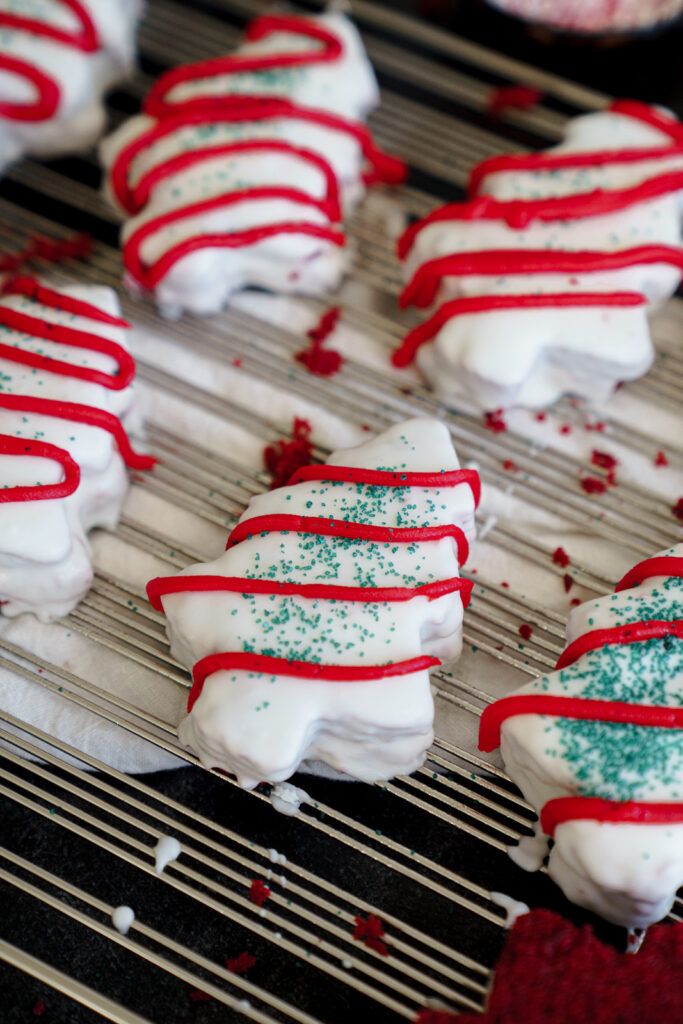
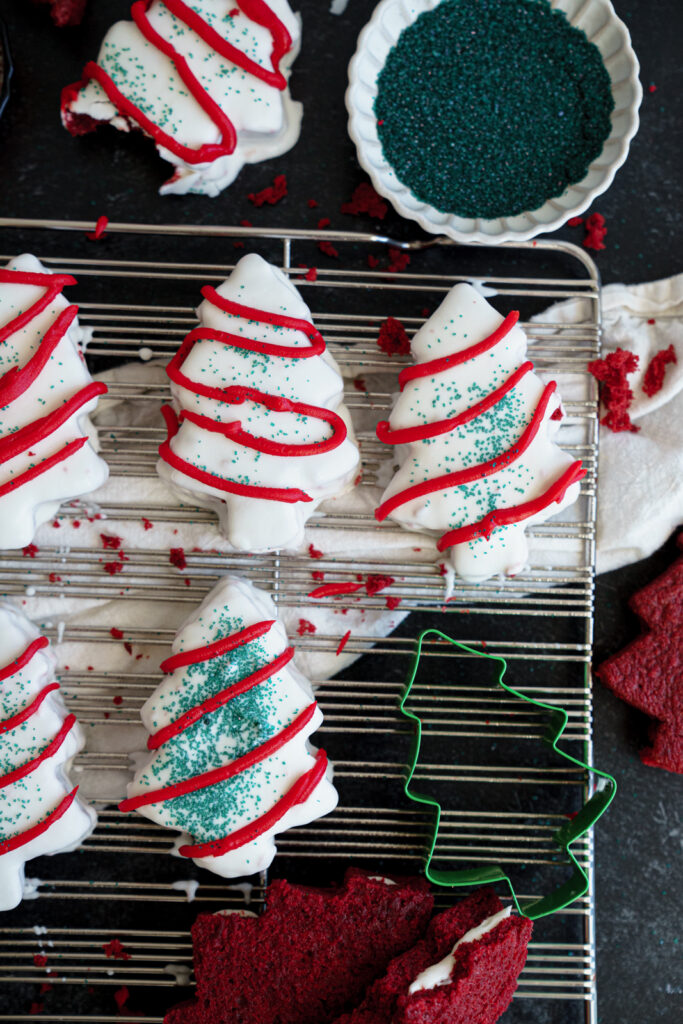
Why You’ll Fall in Love with This Red Velvet Christmas Cake Recipe
There are countless reasons why this Copycat Little Debbie Red Velvet recipe will become your new holiday baking obsession. It’s more than just a dessert; it’s an experience!
- Authentic Homemade Version: Unlike store-bought snacks, this recipe allows you to create a superior version of a classic snack cake using only the finest, real, and high-quality ingredients. You’ll taste the difference that fresh butter, eggs, and rich cocoa make in every bite. This homemade approach ensures a truly indulgent treat, free from preservatives and artificial flavors often found in packaged goods.
- Rich, Moist Red Velvet Cake: Our recipe meticulously blends cocoa powder and sour cream to produce an exceptionally rich, deeply flavored, and incredibly moist cake layer. The acidity from the sour cream reacts with the leavening agents, creating a tender crumb and a vibrant red hue that is truly characteristic of a perfect red velvet cake.
- Irresistible Marshmallow Creme Filling & White Chocolate Coating: The star of the show, beyond the cake, is the luscious combination of the fluffy marshmallow creme filling sandwiched between two cake layers, enrobed in a smooth, sweet white chocolate coating. This delightful duo delivers an exquisite balance of textures – soft, airy filling against a firm, snappy chocolate shell – making each bite an unforgettable experience.
- Festive Tree Shapes for the Holidays: Perfect for the holiday season, this recipe guides you in creating charming tree shapes that instantly add a festive touch to any dessert table. Using a simple cookie cutter transforms a regular cake into an eye-catching, themed treat that will enchant guests of all ages and make your holiday spread truly magical.
- Convenient Single-Serve Snacks: These cakes are designed to be easy-to-make and share as perfect single-serve snacks. They’re ideal for holiday parties, potlucks, or as delightful gifts for friends and neighbors. Their individual portions make them not only hygienic but also simple to manage and enjoy without needing extra plates or cutlery.
Essential Ingredients for Your Copycat Little Debbie Red Velvet Masterpiece
To embark on this delicious baking adventure and create these spectacular Copycat Little Debbie Red Velvet Christmas Cakes, you’ll need a few key items from your local grocery store. For the complete list with precise measurements, make sure to consult the detailed recipe card provided below!
- Unsalted butter and vegetable oil: This combination is crucial for achieving an ultra-moist and tender cake crumb, providing both flavor from the butter and an even, soft texture from the oil.
- Granulated sugar and powdered sugar: Granulated sugar sweetens the cake batter, while powdered sugar is essential for creating the light, fluffy texture of the marshmallow creme filling.
- Eggs, pure vanilla extract, and red food coloring: These ingredients are vital for developing the signature flavor profile and achieving that iconic, vibrant red velvet look. The vanilla deepens the taste, and the red food coloring (or emulsion) provides the characteristic hue.
- Cocoa powder, baking powder, and baking soda: These are the fundamental dry ingredients that give the cake its classic red velvet flavor (a subtle chocolate note) and ensure a perfect rise and tender texture.
- Sour cream and buttermilk: These acidic dairy components react with the leavening agents, making the cake exceptionally moist, tender, and contributing to its rich flavor and vibrant red color.
- Marshmallow fluff and heavy cream: These are the core components for crafting the unbelievably fluffy, sweet, and perfectly pipeable marshmallow creme filling that makes these snack cakes so distinctive.
- White chocolate or almond bark: Essential for creating the smooth, glossy, and deliciously creamy outer coating that encapsulates the cake and filling. Either option works beautifully for dipping.
- Green sprinkles: The final festive touch! These vibrant sprinkles emulate the classic Little Debbie Christmas tree design, adding both visual appeal and a fun crunch.
Step-by-Step Instructions to Create Your Holiday Masterpiece
For the Perfect Red Velvet Cake
Crafting the foundational red velvet cake is the first and most crucial step. Follow these instructions carefully to ensure a moist, tender, and beautifully colored base for your Copycat Little Debbie Red Velvet Christmas Cakes.
- Preheat your oven to a precise 350°F (175°C). Prepare an 18 x 13-inch sheet pan (a standard half-sheet pan works best) by lightly spraying it with nonstick cooking spray. Line the pan with parchment paper, ensuring it covers the bottom and slightly extends up the sides, then spray the parchment paper again. This double-layer of nonstick protection guarantees an easy release.
- In a separate, medium-sized large mixing bowl, thoroughly whisk together all the dry ingredients: cocoa powder, baking powder, baking soda, salt, and all-purpose flour. Whisking ensures these ingredients are evenly distributed, preventing pockets of leavening agents in your final cake. Set this bowl aside for later use.
- Now, in the bowl of a stand mixer (or a large bowl with an electric hand mixer) fitted with the paddle attachment, cream together the softened unsalted butter, vegetable oil, and granulated sugar. Beat on medium-high speed for approximately 4 minutes, or until the mixture becomes visibly light, fluffy, and almost white in color. This creaming process incorporates air, which is vital for a tender cake.
- Add the eggs, one at a time, mixing on low speed after each addition just until incorporated. Don’t rush this step; allowing each egg to fully mix in creates a smooth, emulsified batter. Remember to scrape down the sides and bottom of the bowl with a rubber spatula after each egg addition to ensure everything is evenly combined.
- Next, incorporate the wet flavorings: mix in the pure vanilla extract, red velvet emulsion (or your chosen red food coloring), full-fat sour cream, and white distilled vinegar. Mix on low speed just until combined, about 30-60 seconds. The vinegar and sour cream are key for activating the cocoa powder’s red pigments and creating a tender crumb.
- With the mixer on low speed, gradually add half of the dry ingredient mixture and half of the buttermilk, mixing until just incorporated. Repeat this process with the remaining dry ingredients and buttermilk. Be careful not to overmix the batter once the flour is added, as this can lead to a tough cake. Mix only until no streaks of flour remain.
- Pour the batter evenly into the prepared sheet pan. Use the back of a spatula or spoon to spread it smoothly to the edges, ensuring an even layer for consistent baking.
- Bake for 40-45 minutes. To check for doneness, insert a toothpick into the center of the cake; it should come out clean or with just a few moist crumbs attached.
- Allow the cake to cool completely in the pan on a wire rack. Once at room temperature, transfer the pan to the fridge to chill thoroughly. A chilled cake is significantly easier to cut into precise shapes without crumbling.

Crafting the Dreamy Marshmallow Creme Filling
This light and fluffy filling is what truly makes these Copycat Little Debbie Red Velvet Cakes irresistible. Its airy texture provides a beautiful contrast to the dense cake and snappy chocolate coating.
- In a large mixing bowl, beat the softened unsalted butter on medium speed with an electric mixer for about 2 minutes, until it’s smooth and creamy. Ensure the butter is truly softened to avoid lumps.
- Add the entire cup of marshmallow fluff to the bowl. Continue mixing on medium speed until the butter and marshmallow fluff are fully combined and seamlessly incorporated. Scrape down the sides of the bowl as needed to ensure everything is mixed evenly.
- Gradually add the powdered sugar, about 1 cup at a time, mixing on low speed until each addition is incorporated. Once all the powdered sugar has been added, increase the mixer speed to medium-high and beat for an additional 2-3 minutes until the filling is wonderfully light and fluffy. This aeration is key to its cloud-like texture.
- Finally, mix in the pure vanilla extract, heavy cream (or milk), and salt. Beat just until the mixture is smooth and evenly combined. The heavy cream adds richness and helps achieve the perfect consistency for piping.
- To prepare for decorating, scoop out approximately ¼ cup of the finished marshmallow creme filling. Tint this small portion with red food coloring to create your festive zigzags later. Transfer the red frosting to a small piping bag with a very small hole cut at the tip (or fitted with a small round tip). Place the remaining white marshmallow filling into a separate piping bag with a larger opening, ready for sandwiching the cake layers. Keep both at room temperature to maintain their pipeable consistency.
Assembly – Bringing Your Copycat Little Debbie Red Velvet Cakes to Life
The assembly is where all your hard work comes together to create the iconic Copycat Little Debbie Red Velvet Christmas Tree Cakes. Precision and a little patience will ensure beautiful results.
- Ensure your cake is thoroughly chilled before you begin this step. The firm texture of a cold cake is essential for clean cuts. Using a tree-shaped cookie cutter, carefully cut out individual tree shapes from the chilled cake. Try to get as many as possible, arranging your cuts strategically to minimize waste.
- Once your cake trees are cut, gently slice each tree horizontally through the middle using a serrated knife. This creates two thinner cake layers per tree. Take your time to make even cuts.
- Now, take one half of a sliced cake tree. Using the piping bag with the white marshmallow creme filling, generously pipe the filling onto the cut surface, spreading it evenly all the way to the edges. Then, carefully place the other cake half on top, gently pressing down to create a perfect sandwich. Repeat for all cake trees.
- For the coating, melt the white chocolate or almond bark in a large, heatproof bowl. You can do this in a microwave, stirring in 20-second intervals until smooth, or over a double boiler. Once melted, stir in the coconut oil (or non-flavored oil) until the chocolate is smooth and glossy. The coconut oil helps thin the chocolate for a smoother dip and a snappier finish.
- Dip each assembled cake tree into the melted white chocolate. Use a fork or a dipping tool to carefully lower and lift the cake, allowing excess chocolate to drip off. Place the dipped cakes onto a sheet of parchment paper or a wire rack set over parchment paper to allow the chocolate to set. It’s helpful to work quickly, and if the chocolate begins to thicken, gently reheat it or keep it over a warm water bath.
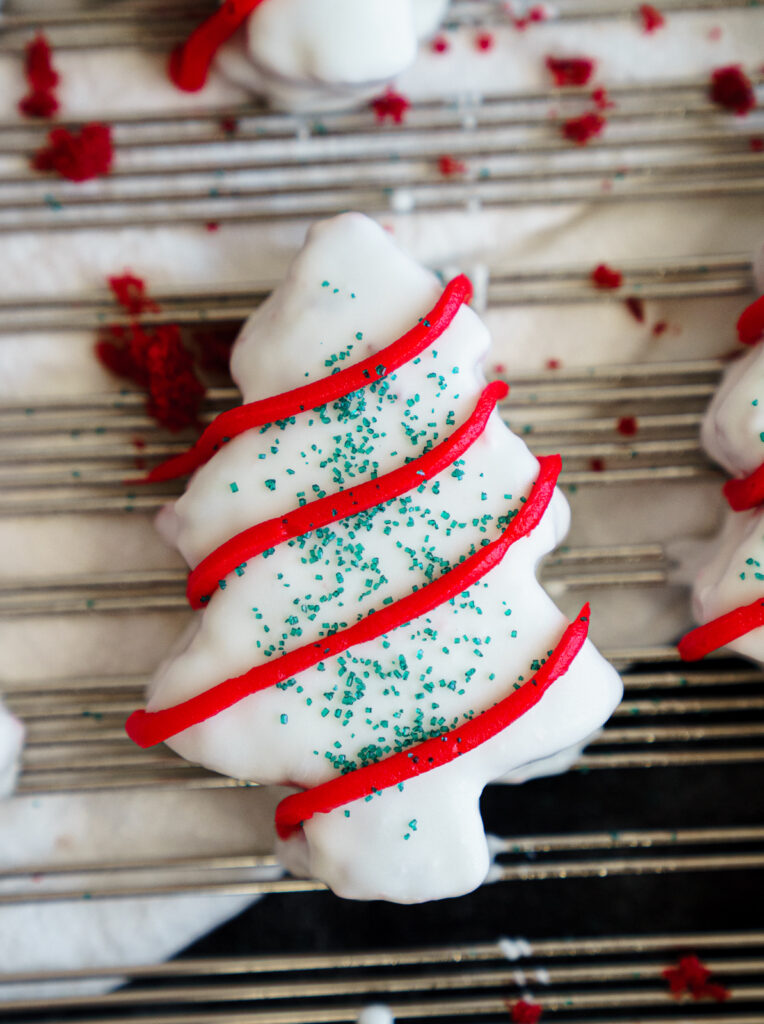
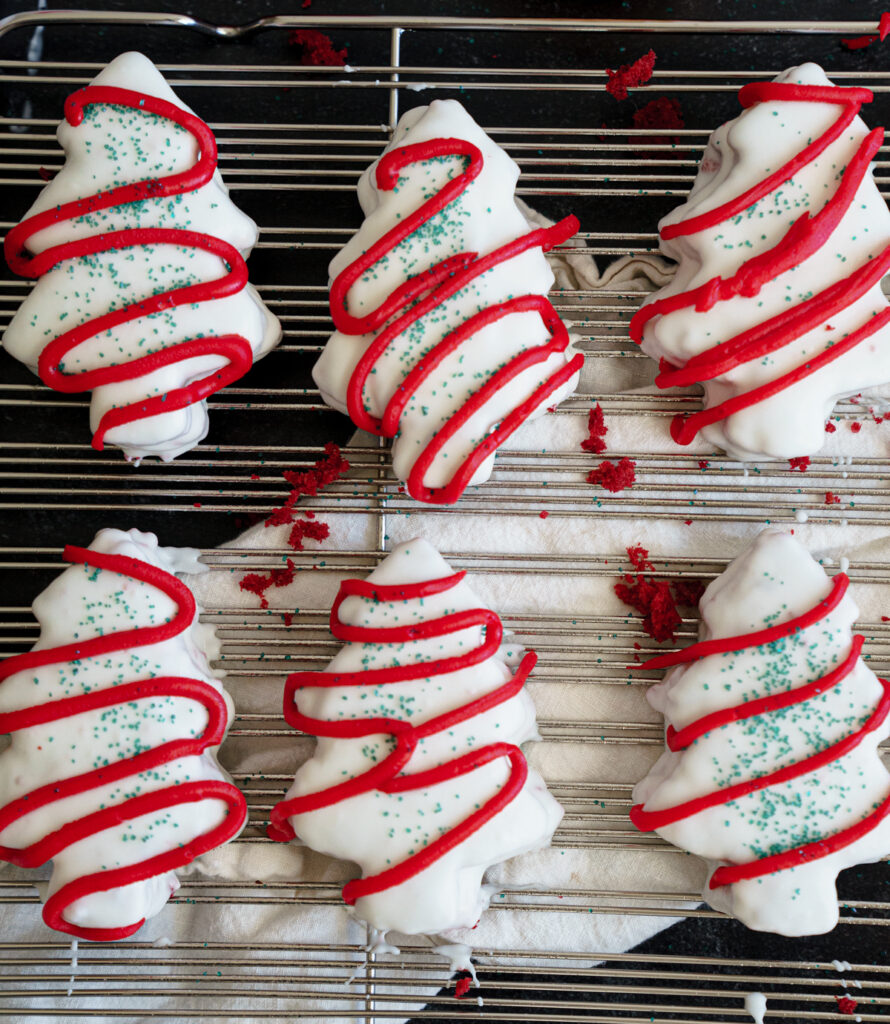
- Once the white chocolate coating has completely set and hardened, retrieve your piping bag with the red frosting. Pipe a festive zigzag design at an angle over each tree, mimicking the classic Little Debbie look. Immediately follow with a generous sprinkling of green sprinkles while the red frosting is still wet, so they adhere well.
Expert Tips and Tricks for Perfect Red Velvet Christmas Cakes
Achieving bakery-quality results with your Copycat Little Debbie Red Velvet Christmas Cakes is easy with these insider tips:
- Achieving the Perfect Red Color: For the most striking, vibrant red hue, always opt for a high-quality red velvet emulsion (like LorAnn’s or Amoretti’s) or a concentrated gel red food coloring. A touch of white distilled vinegar added to the batter also helps activate the cocoa powder’s natural red pigments, deepening the cake’s color and giving it that classic tang.
- Fluffy Filling Consistency is Key: To ensure your marshmallow creme filling is beautifully light and airy, start with truly softened butter. Beat it thoroughly before adding the marshmallow fluff and powdered sugar. The longer you beat it (after all ingredients are in), the fluffier and more pipeable it will become.
- Smooth Chocolate Coating Every Time: When melting your white chocolate or almond bark, incorporating a small amount of coconut oil (or a neutral-flavored oil like vegetable oil) is a game-changer. This thins the chocolate slightly, making it much easier to dip your cakes and ensuring a smooth, even, and glossy coating without any clumping. Keep the melted chocolate in a warm spot (or a warm water bath) while dipping to prevent it from hardening too quickly.
- Clean and Crisp Tree Shapes: For professional-looking, neatly cut tree shapes, always ensure your baked red velvet cake is thoroughly chilled, ideally in the refrigerator for at least an hour, or even the freezer for 15-20 minutes. If the cake starts to soften during the cutting process, simply pop it back into the fridge for a few minutes to firm up again before continuing.
- Room Temperature Filling for Easy Piping: Maintain your marshmallow filling at room temperature before and during assembly. This ensures it remains soft, smooth, and easy to pipe, preventing clogging in your piping bag.
- Keep Chocolate Warm While Dipping: To ensure a consistently smooth and easy dipping experience, keep your melted white chocolate in a warm spot. A makeshift warm water bath (a bowl of chocolate over a slightly larger bowl of warm, not hot, water) is perfect for maintaining the ideal consistency. Stir occasionally.
Recommended Tools for Your Baking Success – Copycat Little Debbie Red Velvet
Having the right tools can make all the difference in making this recipe smooth and enjoyable:
- Stand mixer: Indispensable for creaming butter and sugar, and for whipping up that fluffy marshmallow filling effortlessly.
- Measuring cups and spoons: Essential for accurate measurements, ensuring consistent results every time.
- Tree-shaped cookie cutter: The star tool for creating those iconic and festive Christmas tree shapes.
- Parchment paper: A must-have for lining your baking pan and for setting your dipped cakes, preventing sticking and making cleanup a breeze.
- Piping bags: Crucial for neatly filling your cakes with marshmallow creme and for adding those decorative red zigzags.
- Red velvet emulsion: For that deep, rich red color and authentic red velvet flavor. My favorite brands are LorAnn’s or Amoretti.
Frequently Asked Questions (FAQs) About Your Red Velvet Christmas Cakes
Here are answers to some common questions you might have about making and enjoying your Copycat Little Debbie Red Velvet Christmas Cakes:
Can I make these festive cakes ahead of time for a party?
Absolutely! These cakes are perfect for making in advance. You can store the fully assembled and decorated cakes in an airtight container in the refrigerator for up to 3 days. For longer storage, see our freezing instructions below.
Can I substitute almond bark with white chocolate for the coating?
Yes, you certainly can! Both almond bark and high-quality white chocolate (like white melting wafers or good quality chocolate bars chopped finely) work wonderfully for the coating. Almond bark is often easier to melt and yields a very smooth finish, but white chocolate provides a richer, creamier taste. Choose whichever you prefer or have on hand!
What’s the best way to achieve a truly vibrant red color in the cake?
To get that deep, eye-catching red hue that red velvet is famous for, it’s best to use a concentrated form of coloring. Red velvet emulsion, like the brands recommended, provides excellent color and flavor. Alternatively, a high-quality liquid food coloring or gel food coloring will also yield fantastic results. Using a generous amount and ensuring your batter has enough acidity (from sour cream and vinegar) helps to bring out and stabilize the red pigment. If you are looking for a natural red food coloring, I recommend using Amoretti’s natural red dye!
Storing and Freezing Instructions for Maximum Freshness
To keep your delightful Red Velvet Christmas Tree Cakes fresh and delicious for as long as possible:
Storage: Store the decorated and fully set Christmas tree cakes in an airtight container in the refrigerator for up to 3 days. This helps maintain their freshness, prevents the chocolate from melting, and keeps the filling stable.
Freezing: For longer storage, individually wrap each tree cake tightly in plastic wrap, then place them in an airtight freezer-safe container or freezer bag. They can be frozen for up to a month. When you’re ready to enjoy them, simply transfer the desired number of cakes from the freezer to the refrigerator to thaw overnight, or let them come to room temperature for about 30-60 minutes before serving. Some people even enjoy them slightly chilled for a refreshing treat!
Continue your baking journey with these other fantastic recipes that are perfect for any occasion:
- Easy and Tasty Christmas Sugar Cookie Bars
- Salted Caramel Gingerbread Cake With Buttercream
- Caramel Gooey Butter Cake With Caramel Sauce
We hope you thoroughly enjoyed creating and indulging in these magnificent Copycat Little Debbie Red Velvet Christmas Cakes. Your feedback is incredibly valuable to us, so please don’t hesitate to leave a 5-star rating and a comment below! We love hearing about your baking successes and answering any questions you might have. For more delicious recipes and behind-the-scenes fun, be sure to follow us on Instagram, Pinterest, and TikTok. We share so many fun things across all our platforms, and we can’t wait to connect with you!
Recipe
Copycat Little Debbie Red Velvet
Molly Murphy
Pin Recipe
Dessert
American
13
Ingredients
For the cake
-
1
cup
unsalted butter room temperature -
½
cup
vegetable oil -
1 ¾
cups
granulated sugar -
4
large eggs room temperature -
2
teaspoons
pure vanilla extract -
1 ½
Tablespoons
LorAnn’s red velvet emulsion you can substitute with red food coloring -
¼
cup
full fat sour cream room temperature -
1
teaspoon
white distilled vinegar -
1
Tablespoon
cocoa powder -
2
teaspoons
baking powder -
1
teaspoon
baking soda -
1
teaspoon
salt -
2 ¾
cup
all-purpose flour -
1
cup
buttermilk room temperature
For the marshmallow filling
-
¾
cup
softened unsalted butter -
1
cup
marshmallow fluff -
3
cups
powder sugar -
1
teaspoon
pure vanilla extract -
2
tablespoons
milk or cream preferably heavy cream -
¼
teaspoon
salt
For the white chocolate coating
-
24
ounces
white chocolate or almond bark -
1
tablespoon
coconut oil or non flavored oil
Instructions
For the Cake
-
Preheat your oven to 350°F (175°C). Spray an 18 x 13-inch metal cookie pan (half-sheet pan) with cooking spray, line with parchment paper, and spray again. This ensures easy cake release. Set aside.
-
In a medium-sized bowl, whisk together the cocoa powder, baking powder, baking soda, salt, and all-purpose flour until well combined. This prevents lumps in the batter. Set aside.
-
In the bowl of a stand mixer fitted with the paddle attachment, cream the softened butter, vegetable oil, and granulated sugar on medium-high speed until light and fluffy, approximately 4 minutes. The mixture should become pale and almost double in volume.
-
With a rubber spatula, scrape down the sides and bottom of the bowl thoroughly. With the mixer on medium speed, add the eggs one at a time, mixing for 30 seconds after each addition. Scrape the sides and bottom after each egg to ensure even incorporation.
-
Once all eggs have been added, incorporate the vanilla extract, LorAnn’s red velvet emulsion (or red food coloring), full-fat sour cream, and white distilled vinegar. Mix on low speed just until combined, about 30-60 seconds, being careful not to overmix.
-
Scrape down the sides of the bowl again, then turn the mixer to low speed. Add half of the flour mixture, followed by half of the buttermilk, mixing until just incorporated. Finally, add the remaining flour mixture and the last of the buttermilk, mixing on low. Do not overmix; this step should only take 30-45 seconds to prevent a tough cake.
-
Evenly distribute the prepared red velvet cake batter into the prepared cake pan. Use the back of a spoon or an offset spatula to smooth the batter completely for even baking and a flat top.
-
Bake for 40-45 minutes, or until a wooden toothpick inserted into the very center of the cake comes out with just a few moist crumbs attached. Avoid overbaking to keep the cake moist.
-
Allow the cake to cool completely in the pan on a wire rack. Once at room temperature, transfer the entire pan into the fridge to firm up the cake, making it significantly easier to handle and cut for assembly.
For the Marshmallow Filling
-
In a large mixing bowl, beat the softened butter with an electric mixer on medium speed until it is smooth and creamy, which should take about 2 minutes. Ensure no lumps remain.
-
Add the entire cup of marshmallow fluff to the bowl. Mix until it is fully combined with the butter, scraping down the sides of the bowl as needed to ensure everything is incorporated evenly.
-
Gradually add the powdered sugar, 1 cup at a time, mixing on low speed until it is just incorporated after each addition. Once all the powdered sugar has been added, increase the mixer speed to medium-high and beat for 2-3 minutes until the filling is wonderfully light and fluffy.
-
Add the pure vanilla extract, heavy cream (or milk), and salt, mixing just until combined and smooth. Keep the bulk of this filling at room temperature for easier piping when assembling the cakes.
-
Scoop out approximately ¼ cup of the finished marshmallow filling. Tint this small portion with red food coloring until you achieve a vibrant red. Transfer this red frosting to a small piping bag (or a ziploc bag with a tiny corner snipped) for decorating later. Place the remaining white filling in a separate piping bag with a slightly larger opening for sandwiching the cake layers. Set both aside.
Assembly
-
Once the cake has completely cooled and firmed up, either in the fridge or freezer, proceed to cut your shapes. This chilling step is essential for clean, precise cuts.
-
In a large, heatproof bowl, microwave the white chocolate or almond bark in 20-second intervals, stirring thoroughly after each interval, until it’s completely melted and smooth. Stir in the coconut oil (or non-flavored oil) until fully incorporated and the mixture is glossy.
Tip: To maintain a smooth, dippable consistency, keep the white chocolate mixture in a warm spot, such as over a warm water bath (ensure no water gets into the chocolate!), and stir occasionally while you work. -
Use a tree-shaped cookie cutter to carefully cut the chilled cake into individual tree shapes. You should be able to get approximately 16 trees, depending on the size of your cutter and how efficiently you cut.
-
If the cake softens too much after cutting, which can make it difficult to handle, simply place the cut cake pieces back into the fridge or freezer for 10-15 minutes to firm them back up.
-
Carefully slice each cake tree horizontally through the middle with a sharp serrated knife. This creates two thinner cake layers that will form your sandwich.
-
Pipe the white marshmallow filling onto one half of each sliced tree, piping all the way to the edges for a generous filling. Then, gently place the second cake half on top, pressing lightly to secure and create a filled sandwich.
-
When ready to dip, carefully take one filled cake tree at a time. Using a fork or a dipping tool, gently lower it into the melted white chocolate, ensuring it’s fully coated. Lift it out, allowing any excess chocolate to drip back into the bowl, then place it onto a sheet of parchment paper or a wire rack to set. Repeat for all cakes.
-
Once the white chocolate coating has completely set and hardened, use the reserved red frosting in the piping bag. Pipe a festive zigzag design at an angle over each tree, mirroring the classic Little Debbie pattern. Immediately sprinkle green sprinkles over the wet red frosting to ensure they adhere. Serve and enjoy your homemade holiday treats!
red velvet, little debbie, copycat, Christmas cake, holiday dessert, snack cakes
Tried this recipe?
Let us know how it was!
