The Ultimate Moist & Fluffy Coconut Cake: Your Guide to Tropical Baking Perfection
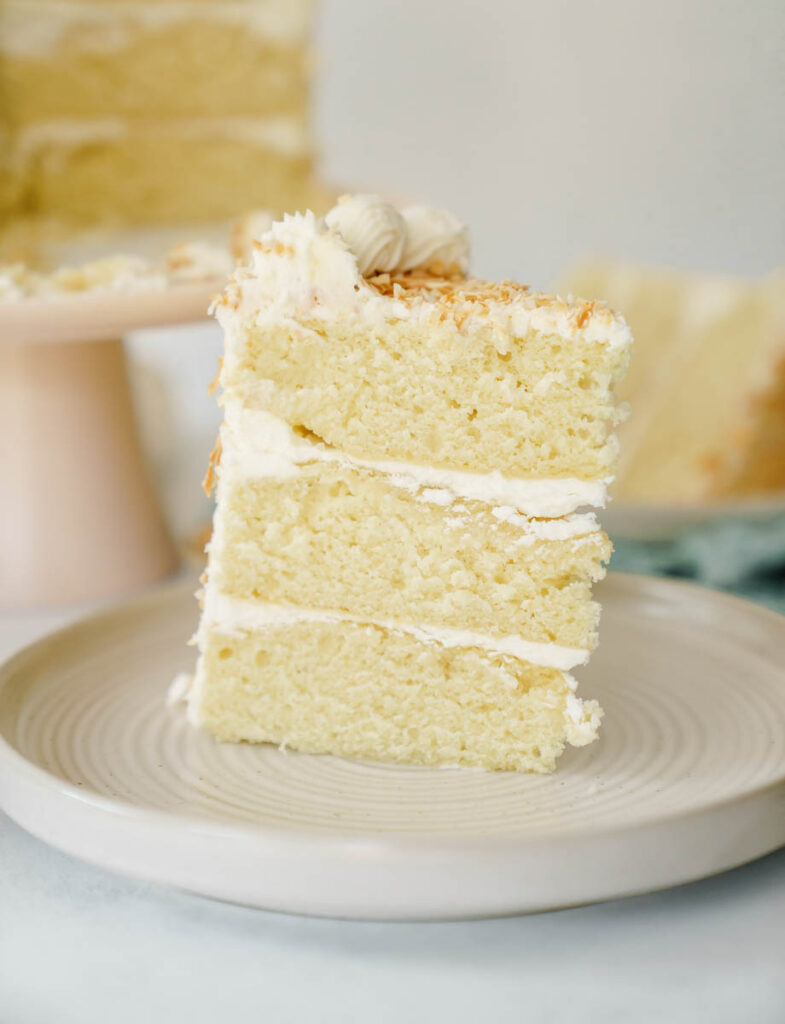
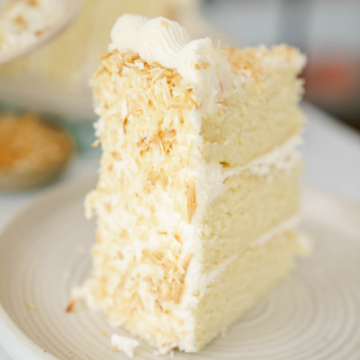
Imagine a slice of pure paradise, delivering a burst of tropical flavor with every forkful. This isn’t just any coconut cake; it’s an exquisite creation featuring remarkably soft and fluffy coconut cake layers, generously filled with a tangy cream cheese buttercream, and enveloped in a delightful coating of perfectly toasted coconut. It’s a harmonious blend of textures and tastes that promises to transport your senses straight to a sunny beach.
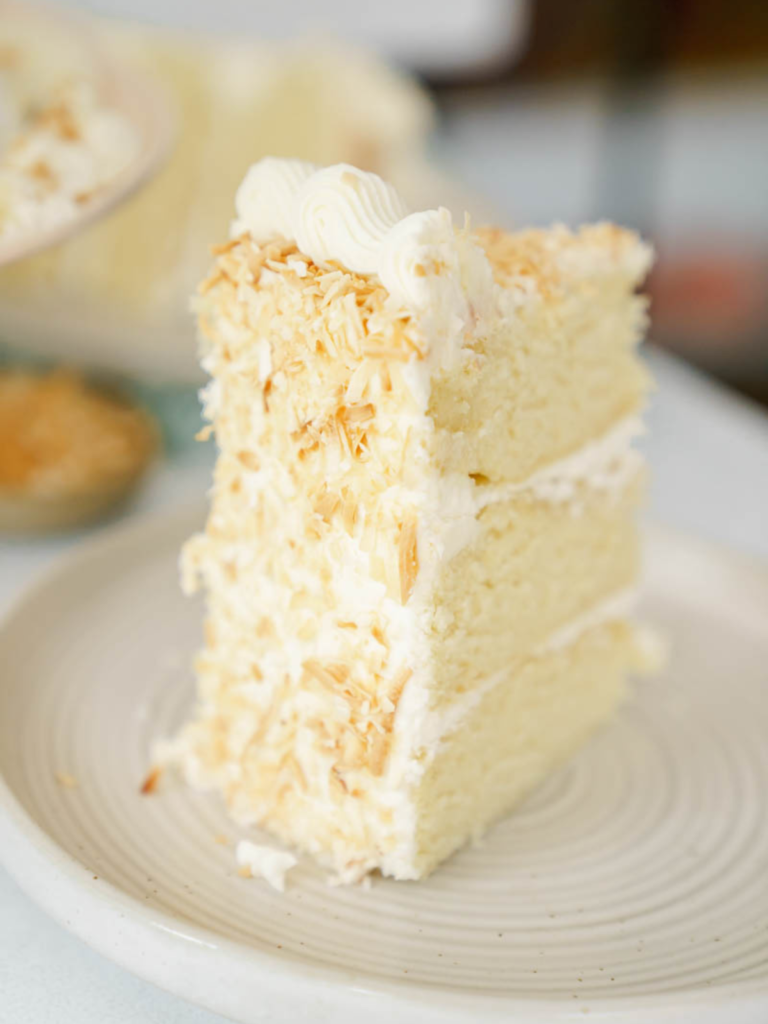
Are you ready to elevate your baking skills and delight your taste buds? Look no further! This exceptional coconut cake recipe, enhanced with a luscious coconut emulsion, promises to deliver an unforgettable tropical experience. From its perfectly moist and airy cake layers to the rich, dreamy coconut cream cheese frosting, this recipe is the very definition of blissful indulgence. Join us on a delightful culinary adventure as we unveil the secrets to crafting this divine coconut cake masterpiece, perfect for any celebration or simply a sweet escape.
For other fantastic summery recipes that are just as delightful, be sure to check out these must-try creations:
- Tasty Graham Cracker S’mores Cake
- The Best Blueberry Buckle Cake
- Strawberry Funfetti Cake With Real Strawberries
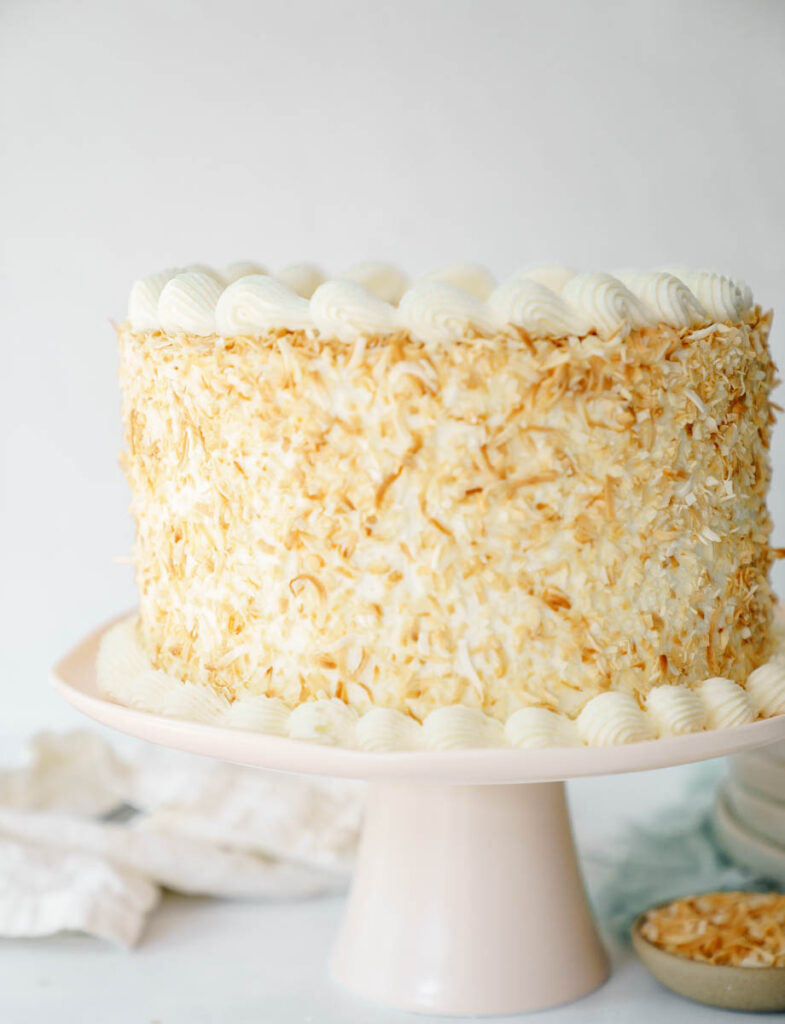
Why This Coconut Cake Will Become Your New Favorite
Are you ready to elevate your baking game and experience a dessert that truly stands out? This coconut cake recipe is an absolute must-try for numerous reasons. It’s not just a cake; it’s a celebration of flavor and texture that will impress everyone who tastes it:
- Unrivaled Tropical Delight: What sets this cake apart is the intelligent use of coconut emulsion. This powerful ingredient infuses every crumb with an intensely concentrated coconut flavor, taking the tropical experience to an extraordinary level. Paired with rich coconut milk in the batter and crunchy toasted coconut flakes on the outside, you get a multi-layered coconut symphony that’s truly irresistible.
- Perfectly Moist and Fluffy Texture: Forget dry, crumbly cakes! This recipe is meticulously crafted to ensure a perfectly moist and airy texture. The combination of ingredients like cake flour, vegetable oil, and sour cream works magic, creating a delicate, melt-in-your-mouth sensation with every single bite. It’s a cake that stays tender for days, making it perfect for preparing ahead.
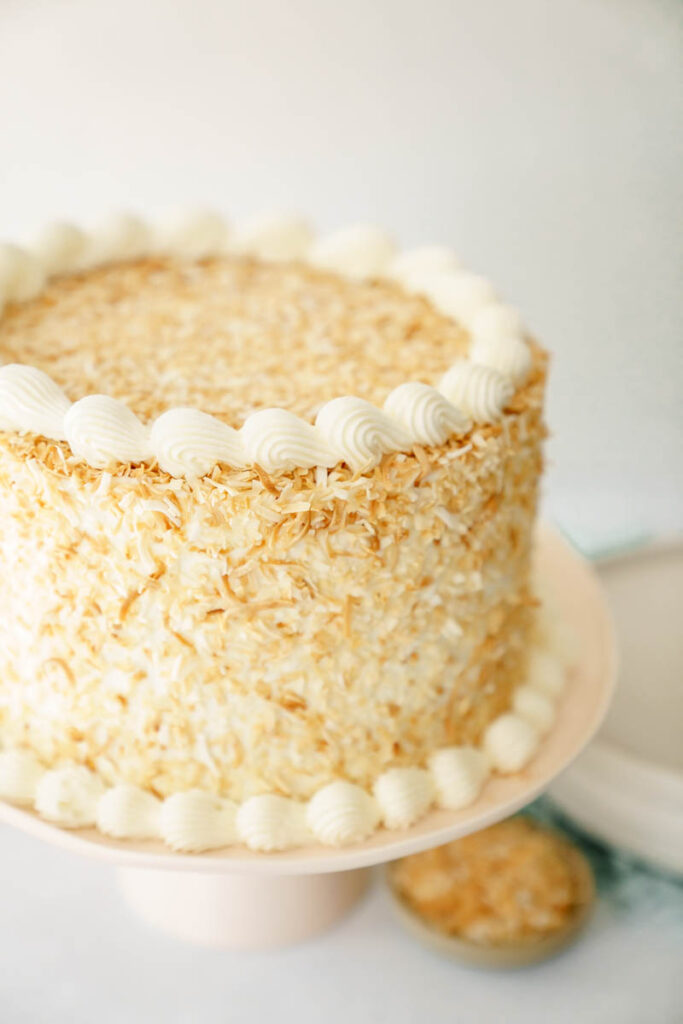
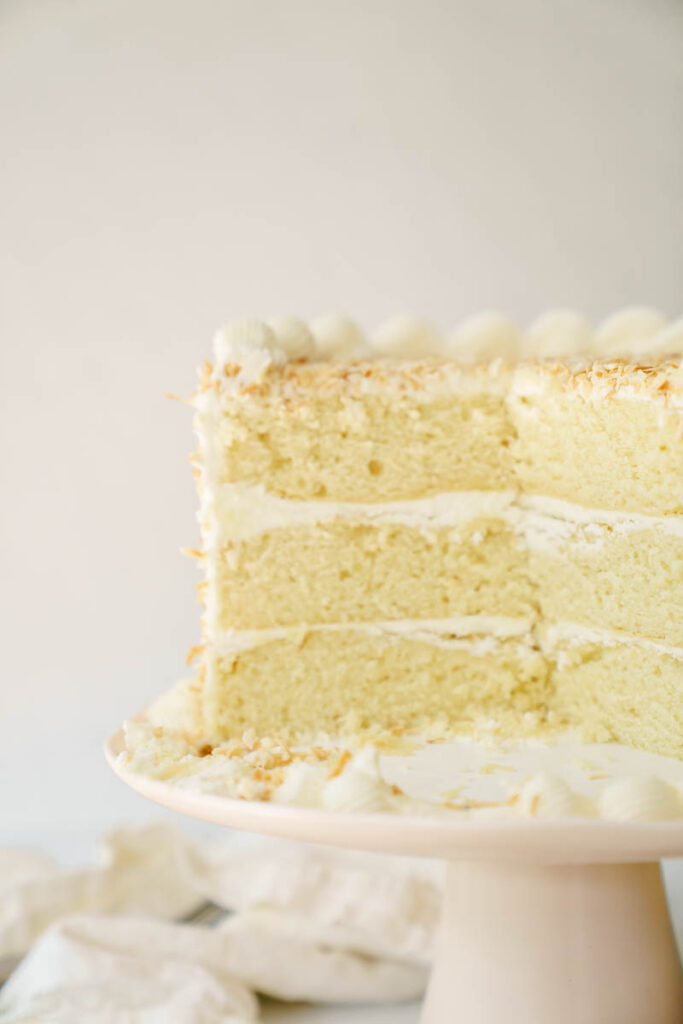
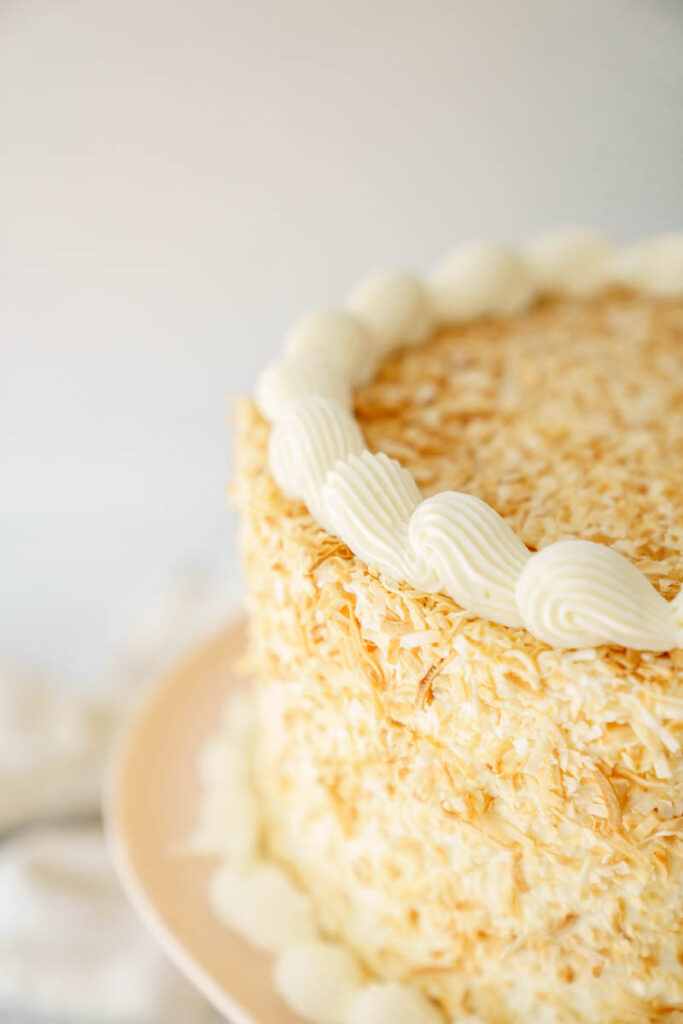
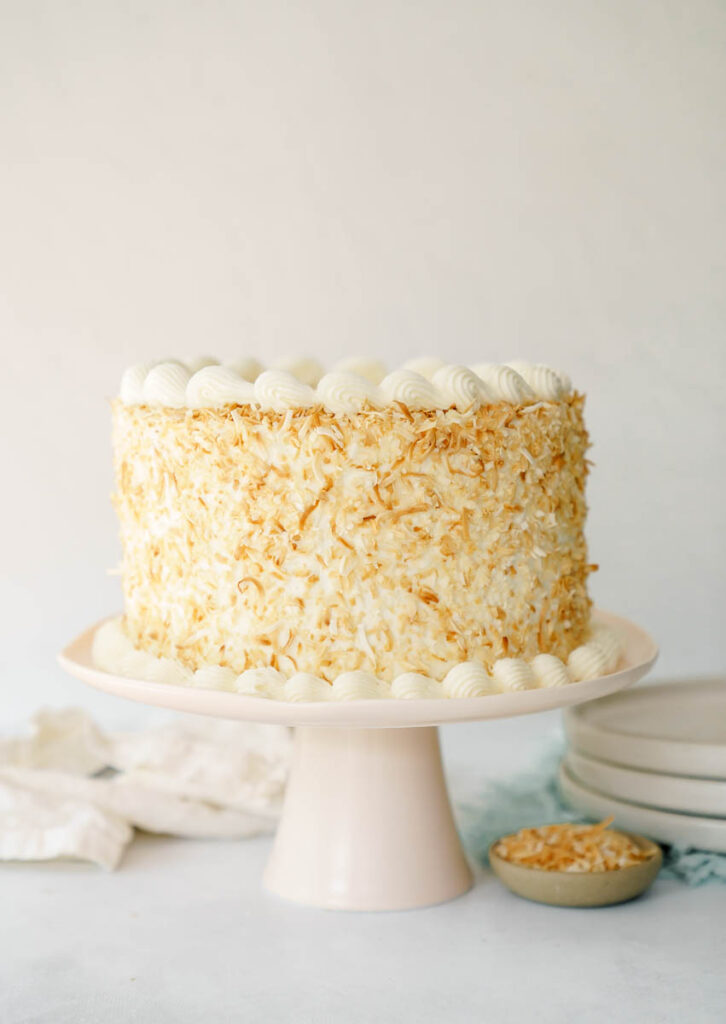
- Stunning & Impressive Presentation: Adorned with beautifully toasted coconut flakes and elegantly layered with creamy frosting, this cake is an absolute showstopper. Whether it’s a casual summer gathering, a birthday celebration, or a special holiday event, its visual appeal alone will garner compliments and make it the centerpiece of any dessert table.
- Surprisingly Easy to Assemble: Despite its gourmet appearance and complex flavor profile, this cake is remarkably straightforward to whip up. With just two main components – the cake layers and the delectable cream cheese buttercream – you’ll find that creating this masterpiece takes hardly any time at all, leaving you more time to enjoy your summer occasions! The clear, step-by-step instructions ensure success even for intermediate bakers.
Get ready to bake a cake that looks professional, tastes phenomenal, and leaves everyone asking for your secret recipe!
Essential Grocery Checklist for Your Heavenly Coconut Cake
To embark on creating this heavenly coconut cake, a few key ingredients are essential. Each plays a crucial role in achieving the perfect texture, flavor, and moistness:
- Cake Flour: This is your secret weapon for a truly soft and delicate crumb. Cake flour has a lower protein content than all-purpose flour, which helps to soften the cake’s structure, giving it that luxurious, melt-in-your-mouth texture. Do not substitute with all-purpose flour without making adjustments.
- Baking Powder: Our primary leavening agent, baking powder ensures the cake rises beautifully, creating those light and airy layers that are a hallmark of this recipe. It reacts twice, once when wet and again with heat, for maximum lift.
- Granulated Sugar: Beyond just sweetness, sugar also contributes significantly to the cake’s tenderness and moisture. It helps to keep the cake soft by interfering with gluten development and retaining moisture.
- Unsalted Butter: Butter adds incredible richness and depth of flavor, contributing to the cake’s tender crumb and delightful taste. Using unsalted butter allows you to control the total amount of salt in your recipe.
- Vegetable Oil: A touch of vegetable oil is included to guarantee a supremely moist cake that stays tender for longer. Oil helps keep the cake moist even when refrigerated, preventing it from drying out.
- Eggs (Whole & Whites): Eggs are vital for structure and stability, acting as a binding agent that holds the cake together. The egg whites, specifically, help achieve a lighter, fluffier texture, while the yolks add richness.
- Coconut Emulsion: This is where the magic happens for intense coconut flavor! Unlike extract, emulsion is water-based and provides a more robust, long-lasting flavor without evaporating during baking. It infuses the cake with a concentrated, authentic coconut essence.
- Sour Cream: Adds another layer of moisture and a subtle tang that balances the sweetness of the cake. Its acidity also helps to activate the baking powder, contributing to the cake’s tender structure.
- Coconut Milk: Adds an unmistakable tropical flavor and contributes richness and moisture to the cake batter. Opt for full-fat canned coconut milk for the best results and deepest flavor.
- Unsweetened Shredded Coconut: This is an optional but highly recommended ingredient for decorating and enhancing the coconut theme. Toasted, it adds a lovely textural contrast and a beautiful golden finish to your cake.
- Salt: A crucial flavor enhancer, salt balances the sweetness and brings out all the wonderful flavors in the cake, making them pop.
Having these ingredients ready and at the correct temperature (especially butter, eggs, and sour cream at room temperature) will set you up for baking success.
Mastering the Art of Coconut Cake: A Step-by-Step Guide
Creating this magnificent coconut cake is a rewarding process that’s easier than you might think. We’ll break down the baking of the cake layers into simple, manageable steps, ensuring you achieve a moist, flavorful foundation for your tropical masterpiece. Precision and attention to detail at each stage will guarantee stellar results.
- Preparation is Key: Begin by preheating your oven to 325°F (163°C). Take three 8-inch round cake pans and prepare them meticulously: spray with cooking spray, line the bottoms with parchment paper, and then spray again. This double-layer of non-sticking ensures your beautiful cake layers release perfectly.
- Combine Dry Ingredients: In a medium-sized bowl, whisk together your cake flour, baking powder, and salt. Whisking ensures these dry ingredients are evenly distributed, which is crucial for a consistent rise and texture. Set this mixture aside for later.
- Cream Wet Ingredients: Using a stand mixer fitted with the paddle attachment, cream together the unsalted butter, vegetable oil, and granulated sugar. Beat on medium-high speed until the mixture is visibly light, fluffy, and smooth – this usually takes about 3 minutes. Don’t forget to scrape down the sides of the bowl with a rubber spatula and cream for another 1-2 minutes to ensure everything is thoroughly combined.
- Incorporate Eggs and Flavor: Add the whole eggs and egg whites one at a time to the creamed mixture, beating well after each addition until fully incorporated (about 30 seconds per egg). Once all eggs are in, beat on medium-high speed for a full minute to add air. Then, mix in the coconut emulsion and sour cream on low speed, just until blended. This step develops the cake’s structure and infuses it with its signature flavor.
- Alternate Dry and Wet: With your mixer on the lowest speed, gradually add the dry ingredients and coconut milk to the batter in alternating additions. Start with one-third of the flour mixture, followed by half of the coconut milk. Repeat with another third of the flour, then the remaining coconut milk, and finally the last third of the flour. Mix only until just incorporated, being careful not to overmix, as this can lead to a tough cake. Scrape the bottom and sides of the bowl to ensure a uniformly mixed batter.
- Bake to Perfection: Divide the batter evenly among your three prepared pans. For best results, use a kitchen scale to ensure precise distribution, leading to evenly baked layers. Bake for 28-32 minutes, or until a toothpick inserted into the center of a cake comes out clean or with only a few moist crumbs attached. Baking times can vary, so keep an eye on your oven.
- Cooling Process: Once baked, allow the cakes to cool in their pans for 10-15 minutes. This crucial resting period helps the cakes firm up before you handle them. After this, carefully invert them onto a wire rack to cool completely to room temperature. Rushing this step can cause cakes to break.
- Prepare for Assembly (or Storage): Once fully cooled, wrap each cake layer tightly in plastic wrap. You can then store them in the refrigerator for up to 3 days or freeze them for up to 2 months until you’re ready to assemble your cake. This is a fantastic way to bake ahead and save time!
By diligently following these detailed steps, you will create a moist, flavorful, and perfectly structured coconut cake that will be the envy of all your guests. The preparation for the cake layers is a critical foundation for the spectacular final result.
Essential Tools for Baking Your Dream Coconut Cake
Having the right tools can make all the difference in your baking experience, ensuring precision, efficiency, and a beautiful final product. For this delightful coconut cake, you’ll benefit from the following:
- Three 8-inch Round Cake Pans: Essential for baking perfectly sized, even cake layers. Having three allows you to bake all layers at once, ensuring consistent texture across the entire cake.
- Parchment Paper: Crucial for preventing sticking and ensuring your delicate cake layers release cleanly from the pans without breaking.
- Mixing Bowls: You’ll need at least two – one for whisking dry ingredients and another, preferably a large one, for combining wet ingredients and the full batter.
- Electric Mixer or Stand Mixer: A powerful tool for creaming butter and sugar, incorporating eggs, and whipping up a smooth, fluffy buttercream with ease and efficiency.
- Cake Turntable (optional but recommended): While not strictly necessary, a turntable greatly simplifies the frosting and decorating process, allowing you to easily rotate the cake for smooth, even coats.
- Offset Spatula: Your best friend for spreading frosting evenly between layers and across the top and sides of the cake, creating a professional finish.
- Cake Scraper: Ideal for achieving perfectly smooth, straight sides on your frosted cake, giving it a polished and professional look.
- Kitchen Scale: Though not listed in the original, a kitchen scale is highly recommended for accurately dividing cake batter between pans, ensuring even layers and consistent baking.
These tools, from basic mixing bowls to specialized decorating instruments, will help you create a truly beautiful and delicious coconut cake with confidence.

Frequently Asked Questions – Perfecting Your Coconut Cake
Baking can sometimes bring up a few questions, especially when striving for perfection. Here are some commonly asked questions about making this delightful coconut cake, along with detailed answers to guide you:
1. Can I use coconut extract instead of coconut emulsion? What’s the difference?
Yes, you can certainly use coconut extract as a substitute for coconut emulsion, but it’s helpful to understand the difference. Coconut emulsion is typically water-based and designed to hold its flavor better during baking because it doesn’t evaporate as quickly as alcohol-based extracts. This results in a more robust and longer-lasting coconut flavor in your cake. Coconut extract, being alcohol-based, can have a more volatile flavor that might lessen during baking. If using extract, you may need to adjust the quantity to achieve your desired coconut intensity. Start with a smaller amount (e.g., half the amount of emulsion) and taste the batter before adding more, as the potency can vary significantly between brands. For the most authentic and intense coconut flavor, emulsion is usually the preferred choice.
2. Can I make this recipe gluten-free? How will it affect the cake?
Absolutely! You can adapt this recipe to be gluten-free. The key is to substitute the cake flour with a high-quality gluten-free flour blend that is specifically formulated for baking cakes. Look for blends that contain xanthan gum or a similar binder, as this helps replicate the elasticity that gluten provides. Keep in mind that gluten-free flours can sometimes affect the cake’s texture, potentially making it slightly denser or more crumbly. To compensate, ensure your ingredients are at room temperature, measure precisely, and avoid overmixing. You might also find that some gluten-free cakes benefit from a slightly longer resting time before serving to allow the flavors and textures to fully meld.
3. Can I make the cake layers ahead of time? What’s the best way to store them?
You absolutely can and often should bake the cake layers in advance! This not only saves time on assembly day but can also improve the cake’s flavor and texture as the moisture settles. Once your cake layers are completely cooled to room temperature, wrap each layer tightly in several layers of plastic wrap. This is crucial for locking in moisture and preventing them from drying out. You can store these tightly wrapped layers at room temperature for up to 1 day, or in the refrigerator for up to 3 days. For longer storage, they can be frozen (see freezing tips below). Just be sure to bring them back to room temperature before you start stacking and frosting your cake for the best results.
4. What other size pans can I use to make this cake, and how do I adjust baking time?
This recipe is quite versatile when it comes to pan sizes! You can easily adapt it for different occasions:
- Two 9-inch round pans: The layers will be slightly thinner, and the baking time will likely be shorter, perhaps around 25-30 minutes.
- Four 6-inch round pans: This will create a taller, more elegant cake. Baking time might be similar or slightly longer than the 8-inch pans, around 30-35 minutes, as the layers are smaller in diameter but potentially thicker.
- One 9×13 inch sheet cake pan: Perfect for a less formal gathering. This will be a single, thick layer, and the baking time will be significantly longer, possibly 40-50 minutes or even more.
The most important tip when changing pan sizes is to **always watch the baking time closely** and use the toothpick test. A reliable oven thermometer can also help ensure your oven is at the correct temperature for consistent baking. The key is that the cake is golden brown around the edges and springs back when lightly touched in the center.
5. How do I achieve the perfect tangy cream cheese buttercream?
The secret to a perfect cream cheese buttercream lies in the temperature of your ingredients and proper mixing. Ensure your butter is slightly chilled (not room temperature like for the cake batter, as this prevents a runny frosting) and your cream cheese is also slightly chilled. Beat the butter and cream cheese together until perfectly smooth before adding powdered sugar. If your frosting is too soft, chill it for 15-20 minutes, then re-whip. If it’s too stiff, add a tiny bit more heavy cream, a teaspoon at a time, until you reach your desired consistency. The tangy flavor comes naturally from the cream cheese, which beautifully cuts through the sweetness of the cake.
Remember, these FAQs are designed to provide general guidance and enhance your baking knowledge. It’s always a good idea to refer to the comprehensive recipe card for precise instructions and measurements. Happy baking!
Storing and Freezing Coconut Cake: Keeping the Tropical Bliss Fresh
After putting in the effort to create a magnificent coconut cake, ensuring its freshness and preserving its delectable flavors for as long as possible is paramount. Whether you’ve made extra, are preparing for a future event, or simply want to enjoy leftovers, proper storage and freezing techniques are key to maintaining that irresistible tropical delight. Follow these helpful tips to keep your coconut cake as fresh and enticing as the first slice.
Storing Your Assembled Coconut Cake: Preserve the Tropical Delight
To keep your frosted coconut cake fresh and moist, especially with cream cheese buttercream, it’s essential to store it correctly. The goal is to protect it from drying out and absorbing unwanted odors. Follow these steps for optimal storage:
- Refrigeration is Best: Once the cake is fully assembled and frosted, it must be stored in the refrigerator. The cool temperature helps maintain the stability of the cream cheese buttercream and keeps the cake fresh, slowing down spoilage.
- Proper Covering: Air is the enemy of cake freshness. To protect your cake from drying out and absorbing fridge odors, use a dedicated cake dome. If you don’t have one, loosely cover the entire cake with plastic wrap, ensuring it doesn’t touch the frosting too much to avoid smudging. For individual slices, press plastic wrap directly onto the cut surface to seal in moisture.
- Avoid Odor Absorption: Refrigerators can be a hub of various smells. Store your coconut cake away from strong-smelling foods like onions or garlic. The plastic wrap or cake dome acts as a barrier, preventing your cake from absorbing these unwanted flavors.
- Bring to Room Temperature Before Serving: While the cake needs to be stored in the fridge, it’s best enjoyed closer to room temperature. About 30 minutes before serving, take the cake out of the refrigerator. This short period allows the buttercream to soften slightly and the cake layers to regain their soft, tender texture, enhancing their delightful flavors.
By following these simple yet effective steps, you can confidently enjoy the tropical bliss of your coconut cake for several days, maintaining its irresistible taste and tender texture.
Freezing Coconut Cake: Extending the Coconut Paradise
If you have leftover coconut cake, wish to prepare it well in advance, or simply want to savor this delight later, freezing is an excellent option. When done correctly, it preserves the cake’s scrumptiousness. Here’s how to freeze your coconut cake layers or even frosted slices while maintaining its quality:
- Complete Cooling is Essential: Whether freezing entire cake layers or frosted slices, it is absolutely crucial to let them cool completely to room temperature. Freezing warm cake will lead to condensation, which can make the cake soggy and prone to freezer burn.
- Individual Layer Wrapping: For un-frosted cake layers, individually wrap each layer tightly with at least two layers of plastic wrap. This initial layer creates an airtight seal, shielding the cake from freezer burn and locking in its precious moisture. For an extra protective barrier, wrap the plastic-wrapped layers again in aluminum foil.
- Freezing Frosted Slices: If you’re freezing individual frosted slices, place them uncovered on a baking sheet in the freezer for about an hour, until the frosting is firm. This “flash freeze” prevents the frosting from sticking to the wrap. Once firm, wrap each slice tightly in plastic wrap, then foil, as described for layers.
- Freezer-Safe Containers: To provide additional protection and prevent any crushing, place your wrapped cake layers or slices in a sturdy freezer-safe container or a heavy-duty zip-top bag. Make sure to press out as much air as possible from the bag before sealing.
- Clear Labeling: Always label the container or bag with the date and the type of cake. This helps you keep track of its freshness and easily identify it among other frozen items.
- Freezing Duration: Properly frozen coconut cake can be stored in the freezer for up to two months without significant loss in quality or flavor. While it may remain safe to eat for longer, beyond this period, the cake might start to experience slight changes in flavor and texture.
- Thawing Process: To thaw your frozen coconut cake (whether layers or slices), transfer the wrapped cake to the refrigerator and allow it to thaw gradually overnight. This slow, gentle thawing process is key to preserving the cake’s original texture and taste, preventing it from becoming dry or mushy. Once thawed, bring it to room temperature before serving for optimal enjoyment.
Remember, meticulous storage and freezing techniques ensure that every bite of your coconut cake remains as fresh, moist, and enticing as the first. So, go ahead and savor the flavors of paradise, whether enjoyed immediately or patiently saved for a later indulgence!
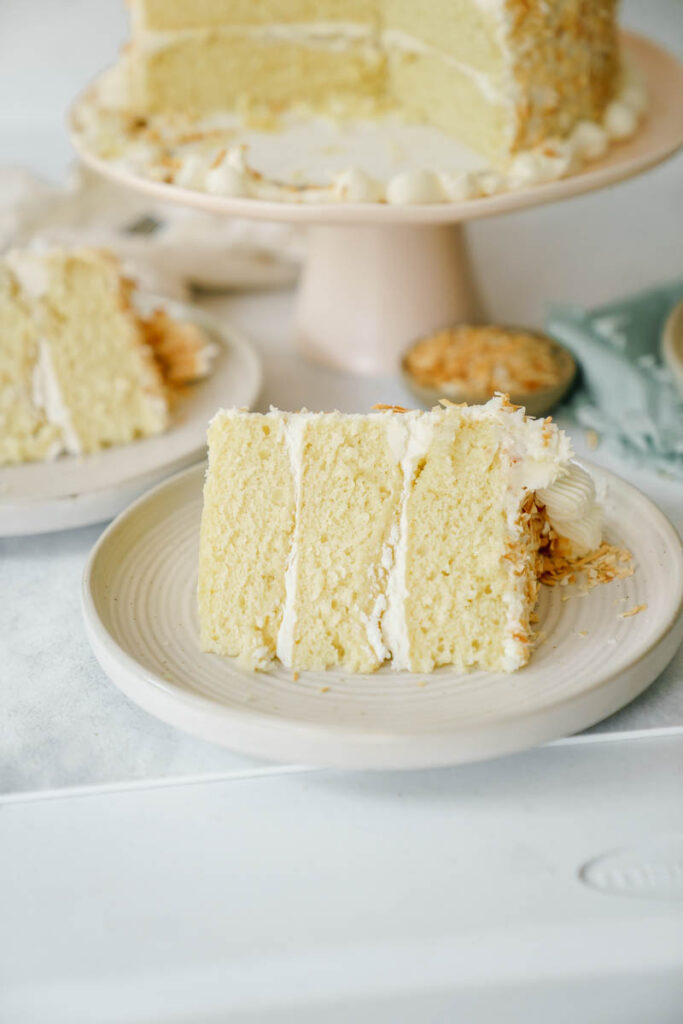
How to serve: Once your stunning cake is stacked and frosted, it’s ready to be the star of the show! You can cut the cake into 8-12 generous pieces, depending on how large you like your slices. I personally love to serve this cake at room temperature, as it allows the buttercream to soften slightly and the flavors to truly sing. However, for a unique and utterly delicious experience, my husband prefers to serve it in a bowl with a splash of milk poured over it – a delightful, comforting twist that’s surprisingly good!
Remember, we love hearing from you! **LEAVE A STAR AND A COMMENT REVIEW** if you loved baking this recipe or have any questions. Your feedback means the world to us! Follow us on Instagram, Pinterest, and TikTok for more fun baking inspiration, tips, and delightful creations!
Recipe
Coconut Cake
Molly Murphy
Pin Recipe
Dessert
Cake
16
Ingredients
For the cake
- 1 cup unsalted butter room temperature
- 1 ¾ cups granulated sugar
- 1 tablespoon vegetable oil
- 3 large whole eggs room temperature
- 4 large egg whites room temperature
- 1 ½ Tablespoon coconut emulsion I use Lorann’s coconut extract is fine too!
- 2 tablespoons sour cream
- 3 cups cake flour
- 1 Tablespoon baking powder
- 1 teaspoon salt
- 1 ¼ cups canned coconut milk high fat and low sugar.
For the coconut cream cheese frosting
- 1 ½ cups unsalted butter slightly chilled
- 4 ounce cream cheese slightly chilled
- 6 cups powdered sugar preferably sifted
- ¼ cup heavy whipping cream
- 1 teaspoon pure vanilla extract
- 1 tablespoon coconut emulsion or extract
- ¼ teaspoon salt
Instructions
For the cake
-
Preheat your oven to 325 degrees F. Spray three 8-inch round cake pans with cooking spray and line with parchment. Spray again. Set aside.
-
In a medium-sized bowl, whisk or sift together the cake flour, baking powder, and salt. Set aside.
-
In the bowl of a stand mixer, fitted with the paddle attachment, cream the butter, oil, and sugar on medium high speed until light/fluffy and smooth, about 3 minutes. With a rubber spatula, scrape down the sides and cream again for 1-2 more minutes.
-
Add the eggs and the egg whites, one at a time, beat on medium-speed until, after each addition, until well incorporated (around 30 seconds after each egg) Once all the eggs have been added, beat on medium speed high for 1 minute. Add the coconut emulsion, sour cream, and mix on low, just until incorporated.
-
With the mixer on the lowest speed, add ⅓ of the flour mixture to the liquid mixture followed by ½ of the coconut milk. Add another ⅓ of the flour mixture, and then the rest of the coconut milk, and finally add the remaining flour mixture. Don’t over mix. Only mix until just incorporated. Scrape the bottom of the bowl to ensure the batter is evenly mixed.
-
With a kitchen scale, evenly distribute the batter to the prepped pans. Bake for 28-32 minutes, or until an inserted toothpick has little to no crumbs sticking to it. Mine took the full 32 minutes, but it can go faster depending on your oven.
-
Let the cakes cool for 10-15 minutes and then take the cakes out of the pan and place them to a wire rack and let them cool until room temperature.
-
Wrap in plastic wrap and store in fridge or freezer until ready to use.
For the cream cheese buttercream
-
In a stand mixer fitted with the paddle attachment, beat the butter and cream cheese on medium-high speed until smooth, about 3 minutes.
-
With the mixer on low, add the powdered sugar until it’s all incorporated.
-
With the mixer on low, add the cream, vanilla, coconut flavoring, and salt.
-
Turn the mixer to medium and beat the frosting for 3 minutes, or until it is light in color.
-
Use a wooden spoon to give it one last stir and push out the air bubbles.
Assembly
-
Level cakes, if needed. Place the first cake layer, bottom side down, in the center of a cake board with a dollop of frosting to act as glue.
-
Spread 1 cup of the coconut buttercream over the cake layer, and with an offset spatula, evenly spread the buttercream ensuring that the top is flat and not slanted.
-
Repeat this step until you get to the final cake layer, which you will lay top side down.
-
Apply a thin coat of buttercream around the entire cake to lock in the crumbs. Freeze for about 10 minutes.
-
After the crumb coat is set, apply the rest of the frosting. To get my look, I toasted some coconut and applied it around the cake, and used leftover frosting and pipe a rim around the top. I used a wilton 8B to obtain the pipped shells and then garnished with a few extra coconut pieces.
cake, coconut, cream cheese coconut cream
Tried this recipe?
Let us know how it was!
