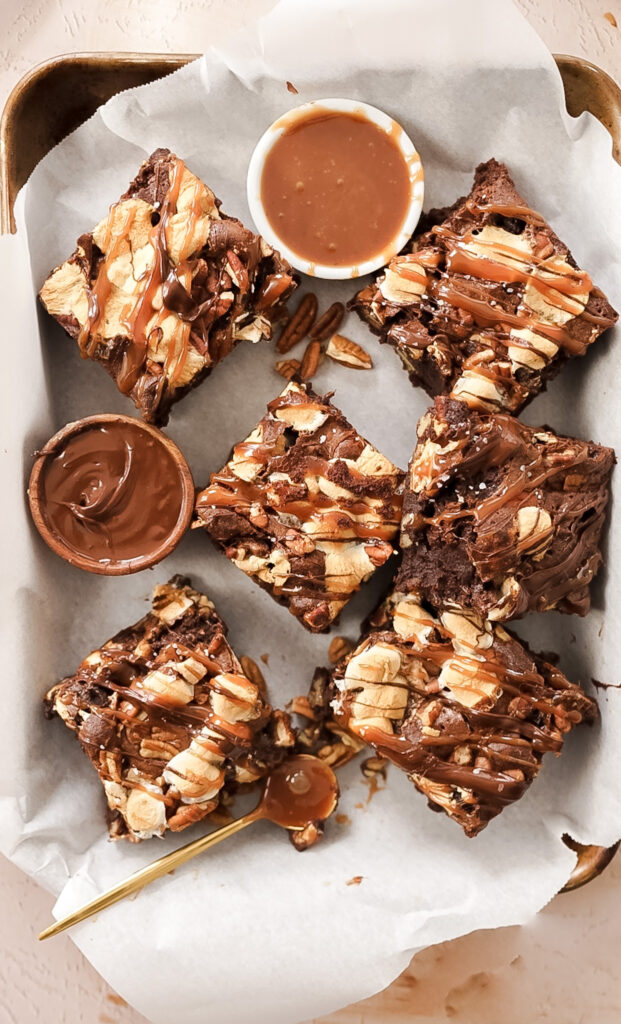
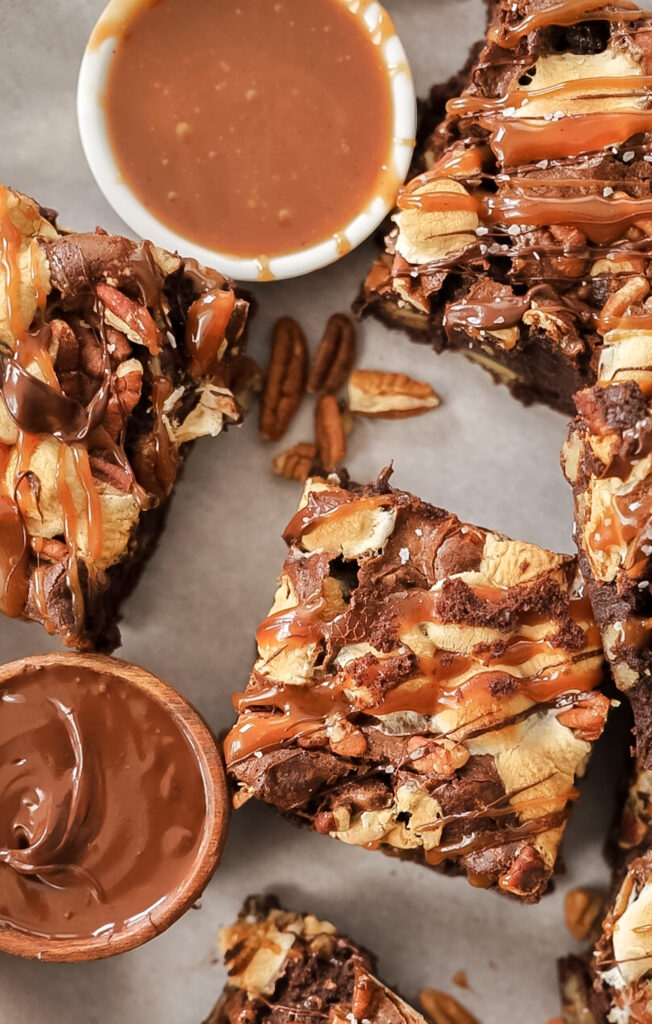
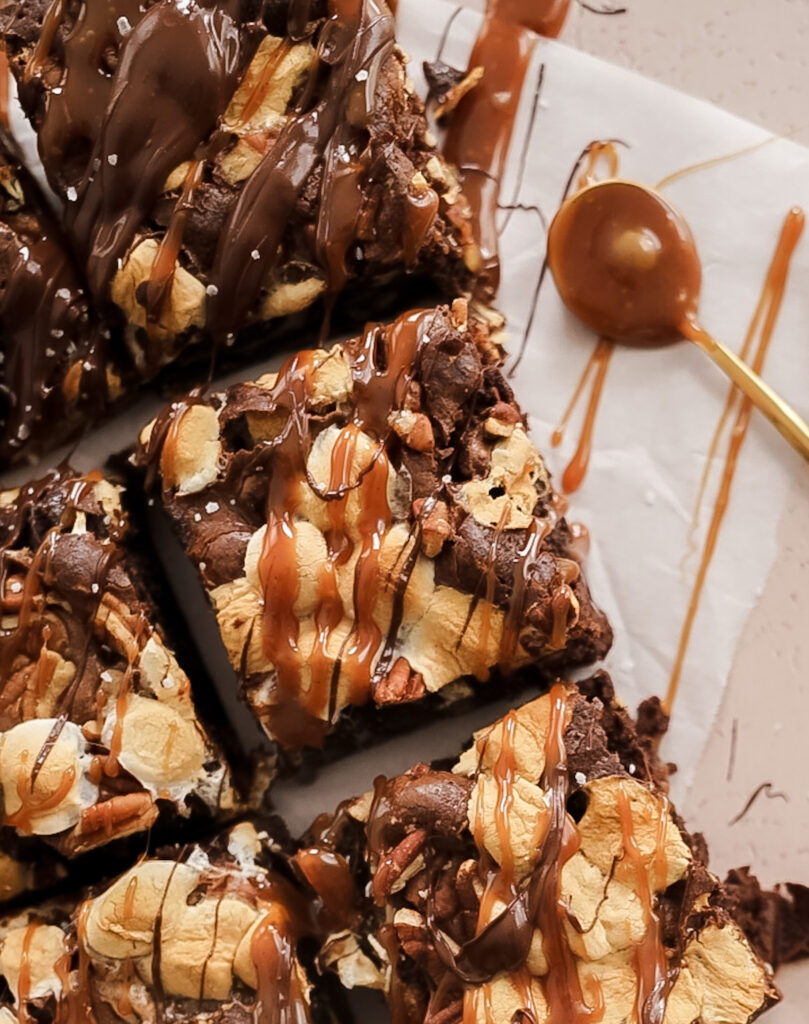
Ultimate Rocky Road Brownies: Fudgy Perfection with Homemade Caramel
Kickstart your week (or any day, really!) with an irresistible treat that promises pure indulgence. These Rocky Road Brownies are not just easy to make; they’re a symphony of rich chocolate, gooey marshmallows, and crunchy nuts, elevated by a luscious homemade caramel sauce. Forget complicated desserts – this recipe delivers big on flavor with minimal fuss, making it the perfect addition to your baking repertoire.

What is Rocky Road? Exploring a Classic Dessert
Before we dive into baking, let’s appreciate the classic that is Rocky Road. Originating in Australia in the late 19th century, Rocky Road was supposedly created to make use of confectionery scraps, turning them into a delicious, no-bake treat. At its heart, Rocky Road is a delightful combination of chocolate, marshmallows, and nuts. This classic trio creates an incredible textural contrast: the smooth, rich chocolate, the soft and chewy marshmallows, and the satisfying crunch of the nuts. While walnuts or almonds are traditional choices, I find that pecans add a buttery, slightly sweet depth that perfectly complements the other elements, making them my go-to for these indulgent Rocky Road Brownies.
The beauty of Rocky Road lies in its simplicity and versatility. It’s a dessert that evokes nostalgia, reminding many of childhood treats and sweet indulgences. By incorporating these beloved Rocky Road elements into a fudgy brownie base, we’re taking a classic to a whole new level of deliciousness. Get ready for a dessert that’s guaranteed to be a crowd-pleaser!

Crafting the Perfect Fudgy Brownie Base
I’ll confess: I grew up loving boxed brownies, and there’s absolutely no shame in that! They’re convenient and consistently good. However, there’s something truly special about a homemade brownie, and I’ve spent years perfecting a foundational brownie recipe that I can proudly call “the best brownie base.” This particular recipe yields the ultimate fudgy, chewy texture that brownie dreams are made of, and it’s the ideal canvas for our Rocky Road additions.
So, what makes this brownie so outstanding? It all comes down to two key ingredients and how we treat them:
- Melted Butter: Unlike brownies made with creamed butter and sugar, using melted butter is the secret to achieving that rich, dense, and incredibly fudgy texture. Creaming butter incorporates air, which can lead to a more cake-like brownie. Melted butter, on the other hand, keeps the brownie moist and dense, ensuring every bite is pure chocolatey bliss. It also contributes a luxurious richness that’s hard to beat.
- High-Quality Dark Cocoa Powder: The quality of your cocoa powder directly impacts the depth of flavor in your brownies. I highly recommend using a good quality dark cocoa powder. This provides a beautiful balance between sweet and intensely bitter chocolate notes, creating a complex and sophisticated flavor profile. Dark cocoa (often Dutch-processed) results in a darker brownie with a less acidic, smoother chocolate taste, making these Rocky Road Brownies truly unforgettable.
Combining these elements with the right ratios of sugar, eggs, and flour ensures a brownie that is consistently moist, deeply chocolatey, and perfectly structured to hold all the delightful Rocky Road toppings.

Essential Ingredients for Your Rocky Road Brownies
Gathering the right ingredients is the first step to baking success. Here’s a detailed look at what you’ll need for these delightful Rocky Road Brownies:
- Unsalted Butter: The foundation of our fudgy brownie base. Unsalted butter gives you control over the overall saltiness of the dish.
- Light Brown Sugar: While granulated sugar works, light brown sugar adds extra moisture and a subtle caramel note, contributing to the brownies’ chewy texture and depth of flavor.
- Large Eggs (Room Temperature): Room temperature eggs incorporate more easily into the batter, creating a smoother, more emulsified mixture. This leads to a more uniform and tender brownie.
- Dark Cocoa Powder: As mentioned, this is key for deep chocolate flavor. Choose a high-quality brand for the best results.
- Vanilla Extract: A crucial flavor enhancer that brings out the best in chocolate. Pure vanilla extract is always recommended for superior taste.
- Chopped Nuts of Your Choice (Pecans Recommended): I adore pecans for their buttery flavor and satisfying crunch, but feel free to use your favorite – walnuts or almonds are also excellent.
- All-Purpose Flour: Just enough to bind the ingredients without making the brownies dry or cakey.
- Mini Marshmallows: These are essential for the classic Rocky Road texture, melting slightly into gooey pockets in the brownies.
- Melted Chocolate, for the Drizzle: A final touch of chocolatey decadence. Dark chocolate works beautifully here.
- Caramel Sauce (Homemade or Store-Bought): While a homemade caramel sauce elevates these brownies to gourmet status, a high-quality store-bought caramel (like Ghirardelli) is a fantastic shortcut if you’re short on time.

Mastering the Art of Homemade Caramel Sauce
Yes, I’ve made big claims about “the best brownie” and now “the best caramel,” but my goal is genuinely to guide you to create the most incredible desserts. Homemade caramel might seem daunting, but I promise it’s achievable and incredibly rewarding! The rich, buttery flavor of homemade caramel truly elevates these Rocky Road Brownies from great to absolutely extraordinary. Let’s break down the process with some key tips to ensure your success:
- The Initial Mix: Begin by combining sugar, water, and corn syrup in a medium-sized saucepan over medium heat. Stir this mixture gently with a whisk *only* until the sugar completely dissolves. Once it’s dissolved, put your whisk down and resist the urge to stir again.
- The No-Stir Rule: This is perhaps the most crucial rule for perfect caramel. Once the sugar has dissolved, do not stir the mixture as it boils and cooks. Stirring can introduce sugar crystals from the sides of the pan back into the syrup, causing the entire batch to crystallize and become grainy.
- Observe the Bubbles: As the mixture heats, you’ll notice small, fast bubbles. As the sugar caramelizes and the syrup thickens, the bubbles will naturally become larger and slower. This is a good visual indicator of progression.
- Patience for Color Change: It takes a few minutes for the mixture to begin changing color. Once it starts to turn, however, be vigilant! Caramel can go from perfectly amber to burnt in a matter of seconds. You’re aiming for a beautiful, rich amber color, similar to a copper penny. If you have a candy thermometer, it should reach about 380°F (193°C).
- Warm Your Cream: Before adding it to the hot caramel, gently warm your heavy whipping cream in the microwave for about a minute. Adding cold cream to hot caramel can cause the sugar to seize and harden, making it difficult to achieve a smooth sauce. Warming the cream minimizes this temperature shock.
- Slow and Steady Cream Addition: Once your sugar syrup reaches the desired amber color and temperature, immediately remove it from the heat. Carefully and *slowly* pour in the warm heavy whipping cream while continuously whisking. Be cautious, as the mixture will bubble up vigorously.
- Finishing Touches: After incorporating the cream, transfer your caramel to a different, heat-safe bowl. This helps stop the cooking process. Then, add in your vanilla extract, butter, and salt. Allow the butter to sit for a few minutes to melt into the warm caramel before stirring everything together until smooth and perfectly combined.
- Cooling is Key: For drizzling consistency, allow your homemade caramel sauce to cool to room temperature. It will thicken considerably as it cools, achieving that perfect, pourable texture.
With these tips, you’ll be making smooth, rich, and flavorful homemade caramel like a pro, adding an unforgettable touch to your Rocky Road Brownies.
Recipe

Rocky Road Brownies
Molly Murphy
Pin Recipe
Ingredients
For the brownies
- 1 ¼ cups unsalted butter
- 2 ½ cups light brown sugar
- 4 large eggs room temperature
- 1 ½ cups dark cocoa powder
- 1 teaspoon salt
- 1 Tablespoon vanilla extract
- ⅔ cup all-purpose flour
- 1 cup chopped pecans
- 1 cup mini marshmallows plus a handful for garnish
- For the caramel
- 1 cup granulated sugar
- ¼ cup water
- 3 Tablespoons light corn syrup
- ¾ cup heavy whipping cream
- 2 teaspoons pure vanilla extract
- 1 teaspoon kosher salt
- Note: if you don’t want to make your own caramel you can totally use store bought, my favorite brand is Ghirardelli
Garnish:
- Caramel sauce
- Chopped pecans
- Melted dark chocolate
Instructions
For the brownies
-
Preheat your oven to 325°F (160°C). Prepare a 9″x9″ baking pan by lining it with parchment paper, leaving an overhang on the sides to easily lift the brownies out later. Lightly spray the parchment with cooking spray and set aside.
-
In a medium-sized, microwave-safe bowl, combine the unsalted butter and light brown sugar. Heat this mixture in 30-second intervals in the microwave, stirring well after each interval, until the butter is completely melted and the sugar is mostly dissolved (this usually takes about 2 minutes total). Stir until smooth.
-
Allow the butter-sugar mixture to cool slightly to avoid cooking the eggs. Once slightly cooled, whisk in the large eggs one at a time, ensuring each egg is fully incorporated before adding the next. Continue whisking until the mixture becomes lighter in color and slightly fluffy.
-
Using a rubber spatula, gently fold in the dark cocoa powder, all-purpose flour, salt, chopped pecans, mini marshmallows, and vanilla extract. Mix until just combined; be careful not to overmix, which can lead to tough brownies.
-
Pour the brownie batter into your prepared pan, spreading it evenly. Sprinkle a small handful of extra marshmallows and chopped pecans over the top for a beautiful finish. Bake for approximately 45 minutes. Begin checking for doneness at 40 minutes by inserting a toothpick into the center of the brownies. If it comes out with moist crumbs, they’re ready. Depending on your oven, it might take up to 50 minutes.
-
Allow the brownies to cool slightly in the pan before proceeding with assembly. This helps them set and prevents them from falling apart.
For the caramel
-
In a medium-sized, heavy-bottomed saucepan, stir together the granulated sugar, water, and light corn syrup.
-
Place the saucepan over medium heat and bring the sugar mixture to a boil. Crucially, do not stir the mixture once it starts boiling. Initially, the bubbles will be small and rapid. As the caramelization process begins and the sugar thickens, the bubbles will become larger and slow down. Stirring at this stage can cause crystallization, resulting in a grainy caramel.
-
Continue to boil the mixture without stirring until it transforms into a rich, golden-brown caramel. This usually happens when the temperature reaches 380°F (193°C) on a candy thermometer. This step can take several minutes, but once it starts to change color, it can burn quickly, so watch it carefully.
-
While the caramel is cooking, warm the heavy whipping cream in the microwave for approximately 1 minute. This pre-warming prevents the sugar mixture from seizing when the cream is added.
-
Once the caramel has reached its desired color, immediately turn off the heat. Carefully and slowly pour the warm cream into the hot sugar mixture while whisking continuously. The mixture will bubble up, so be mindful of potential splatters. Continue mixing until the caramel and cream are thoroughly combined into a smooth sauce.
-
Pour the finished caramel mixture into a separate bowl. Add the pure vanilla extract, kosher salt, and butter. Let the mixture sit for a few minutes to allow the butter to melt fully into the warm caramel. Once melted, stir until completely smooth.
-
Allow the caramel sauce to cool to room temperature before drizzling it over your brownies. It will thicken as it cools, achieving the perfect consistency for drizzling.
For the assembly
-
Once the Rocky Road Brownies have completely cooled in the pan, carefully lift them out using the parchment paper overhang. Drizzle generously with your melted dark chocolate and the cooled homemade (or store-bought) caramel sauce. Finish by sprinkling a few more chopped pecans and mini marshmallows on top for an extra flourish. Cut into squares and prepare for pure delight!
Serving Suggestions and Creative Variations
These Rocky Road Brownies are fantastic on their own, but a few simple additions can turn them into an even more spectacular dessert experience. Serve them slightly warm with a scoop of vanilla bean ice cream, allowing the caramel and chocolate drizzles to melt into a decadent sauce. A sprinkle of sea salt flakes just before serving can also enhance the flavors, providing a delightful contrast to the sweetness.
Feeling creative? Here are a few ideas to customize your Rocky Road Brownies:
- Nut Alternatives: While pecans are my favorite, you can easily swap them for walnuts, almonds, peanuts, or even a mix of different nuts for varied texture and flavor.
- Extra Add-ins: For an even richer brownie, fold in some chocolate chips (milk, dark, or white) into the batter with the marshmallows and pecans. Crushed pretzels or a sprinkle of dried cranberries could also add an unexpected twist.
- Marshmallow Topping: Instead of just sprinkling marshmallows on top before baking, you can also add a layer of marshmallows during the last 5-10 minutes of baking, then torch them lightly with a kitchen torch for a beautiful, toasted marshmallow effect.
- Chocolate Drizzle: Experiment with different types of melted chocolate for the drizzle – milk chocolate for a sweeter touch, or even white chocolate for a visually striking contrast.
Storage Tips for Your Rocky Road Brownies
To keep your Rocky Road Brownies fresh and delicious, store them in an airtight container at room temperature for up to 3-4 days. If you prefer them chilled or need to store them longer, they can be kept in the refrigerator for up to a week. For longer storage, you can also freeze the brownies. Wrap individual squares tightly in plastic wrap, then place them in a freezer-safe bag or container. They’ll keep well in the freezer for up to 2-3 months. Thaw them at room temperature or warm them gently in the microwave for a quick, comforting treat.
Conclusion: A Decadent Treat Awaits
From the rich, fudgy base to the gooey marshmallows, crunchy pecans, and the crowning glory of homemade caramel, these Rocky Road Brownies are truly a masterpiece. They bring together classic flavors and textures in a way that’s both comforting and exciting. Whether you’re baking for a special occasion, a gathering with friends, or simply treating yourself, this recipe is guaranteed to impress. Don’t let the homemade caramel intimidate you – follow our tips, and you’ll achieve perfection. Dive into this recipe and experience the joy of creating truly extraordinary Rocky Road Brownies!
